上次介紹使用LAMP建置Wordpress後,許多讀者來信希望能夠使用Nginx架設Wordpress,今天就來一篇教學。
想瞭解LAMP架構建置Wordpress的朋友可以先去看這篇。
延伸閱讀👉【實戰自架網站】手把手從零到有Linux Ubuntu上建置 WordPress 環境,來架設自己的網頁!
LEMP架構是一種Web伺服器架構,它由Linux、Nginx、Mariadb(或是MySQL)和PHP組成。跟之前的LAMP相比,把Apache換成Nginx
以下簡單介紹LEMP架構的優點:
- Nginx效率相較Apache更快,因為它吃的資源少,本身輕量化,適合簡單的靜態網站。
- LEMP架構的配置比LAMP架構更簡單。
文章大綱
Toggle開始安裝LEMP
本次架設環境使用Ubuntu22.04並以root權限進行
1. 更新系統
apt update && apt upgrade -y
▲ 本文的代碼都可以使用滑鼠到代碼右邊點擊「copy」複製唷!
2. 安裝Nginx
apt install nginx -y
3. 安裝 PHP8.1
apt install php8.1 -y
4. 安裝 PHP相關套件
apt install php8.1-fpm php8.1-cli php8.1-common php8.1-mbstring php8.1-xmlrpc php8.1-soap php8.1-gd php8.1-xml php8.1-intl php8.1-mysql php8.1-cli php8.1-ldap php8.1-zip php8.1-curl php8.1-opcache php8.1-readline php8.1-xml php8.1-gd -y
5. 安裝 MariaDB
apt install mariadb-server mariadb-client -y
6. 進入MariaDB新增資料庫跟使用者 (給WordPress用,資料庫名稱、使用者名稱、密碼要替換)
					mysql -u root
create database 資料庫名稱;
create user 使用者名稱@localhost >identified by ‘使用者密碼’;
grant all privileges on 資料庫名稱.* to 使用者名稱@localhost;
flush privileges;
exit;
7. 下載WordPress
wget https://tw.wordpress.org/latest-zh_TW.zip
8. 建立資料夾
mkdir -p /usr/share/nginx
9. 安裝zip解壓縮
					apt install unzip
unzip latest-zh_TW.zip -d /usr/share/nginx/
10. 把解壓縮完成的資料夾改名稱(域名要改成自己的)
mv /usr/share/nginx/wordpress /usr/share/nginx/example.com
11. 移到wp資料夾中編輯config資料(域名要改成自己的)
					cd /usr/share/nginx/example.com/
cp wp-config-sample.php wp-config.php
nano wp-config.php
12. config資料內容改為前面資料庫建立的名稱
					/** The name of the database for WordPress */
define('DB_NAME', '資料庫名稱');

/** MySQL database username */
define('DB_USER', '使用者名稱');

/** MySQL database password */
define('DB_PASSWORD', '使用者密碼');
13. 設置權限(改成自己的域名)
					chmod 640 wp-config.php
chown www-data:www-data /usr/share/nginx/example.com/ -R
14. 編輯 Nginx設定檔(改成自己的域名)
nano /etc/nginx/conf.d/example.com.conf
15. 下面這段直接複製貼進 您的域名.conf 內(LINE4,5 記得改成自己的域名)
					server {
  listen 80;
  listen [::]:80;
  server_name www.example.com example.com;
  root /usr/share/nginx/example.com/;
  index index.php index.html index.htm index.nginx-debian.html;

  error_log /var/log/nginx/wordpress.error;
  access_log /var/log/nginx/wordpress.access;

  location / {
    try_files $uri $uri/ /index.php;
  }

   location ~ ^/wp-json/ {
     rewrite ^/wp-json/(.*?)$ /?rest_route=/\ last;
   }

  location ~* /wp-sitemap.*\.xml {
    try_files $uri $uri/ /index.php$is_args$args;
  }

  error_page 404 /404.html;
  error_page 500 502 503 504 /50x.html;

  client_max_body_size 20M;

  location = /50x.html {
    root /usr/share/nginx/html;
  }

  location ~ \.php$ {
    fastcgi_pass unix:/run/php/php8.1-fpm.sock;
    fastcgi_param SCRIPT_FILENAME $document_root$fastcgi_script_name;
    include fastcgi_params;
    include snippets/fastcgi-php.conf;
    fastcgi_buffers 1024 4k;
    fastcgi_buffer_size 128k;
  }

  #enable gzip compression
  gzip on;
  gzip_vary on;
  gzip_min_length 1000;
  gzip_comp_level 5;
  gzip_types application/json text/css application/x-javascript application/javascript image/svg+xml;
  gzip_proxied any;

  # A long browser cache lifetime can speed up repeat visits to your page
  location ~* \.(jpg|jpeg|gif|png|webp|svg|woff|woff2|ttf|css|js|ico|xml)$ {
       access_log        off;
       log_not_found     off;
       expires           360d;
  }

  # disable access to hidden files
  location ~ /\.ht {
      access_log off;
      log_not_found off;
      deny all;
  }
}
修改完成後按Ctrl+O再按Enter存檔,Ctrl+X退出nano文字編輯。
16. 存檔離開後測試設定檔內容執行是否成功
nginx -t

17. 重新啟動nginx
systemctl restart nginx
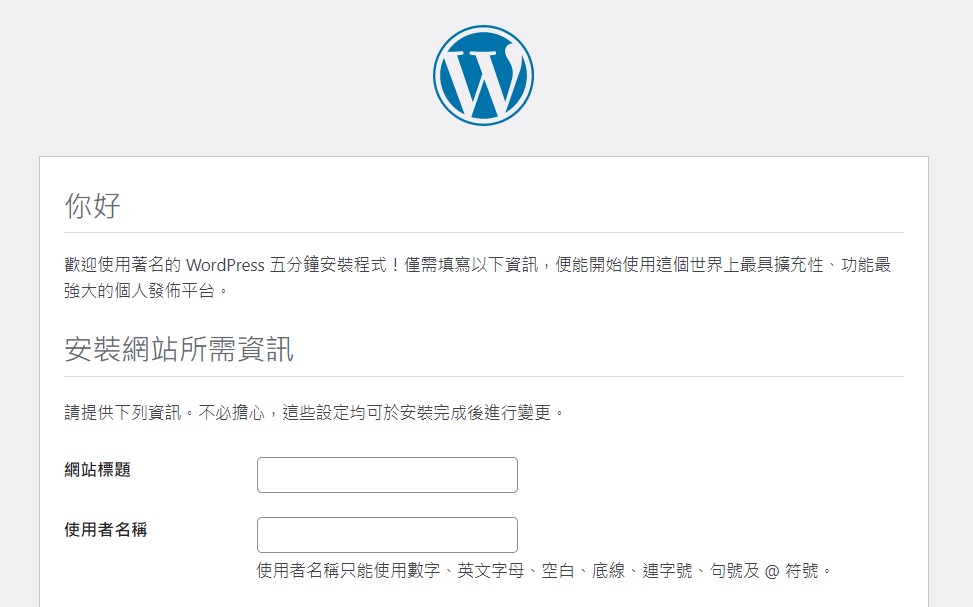
最後在瀏覽器輸入URL就可以進入wordpress安裝頁面


